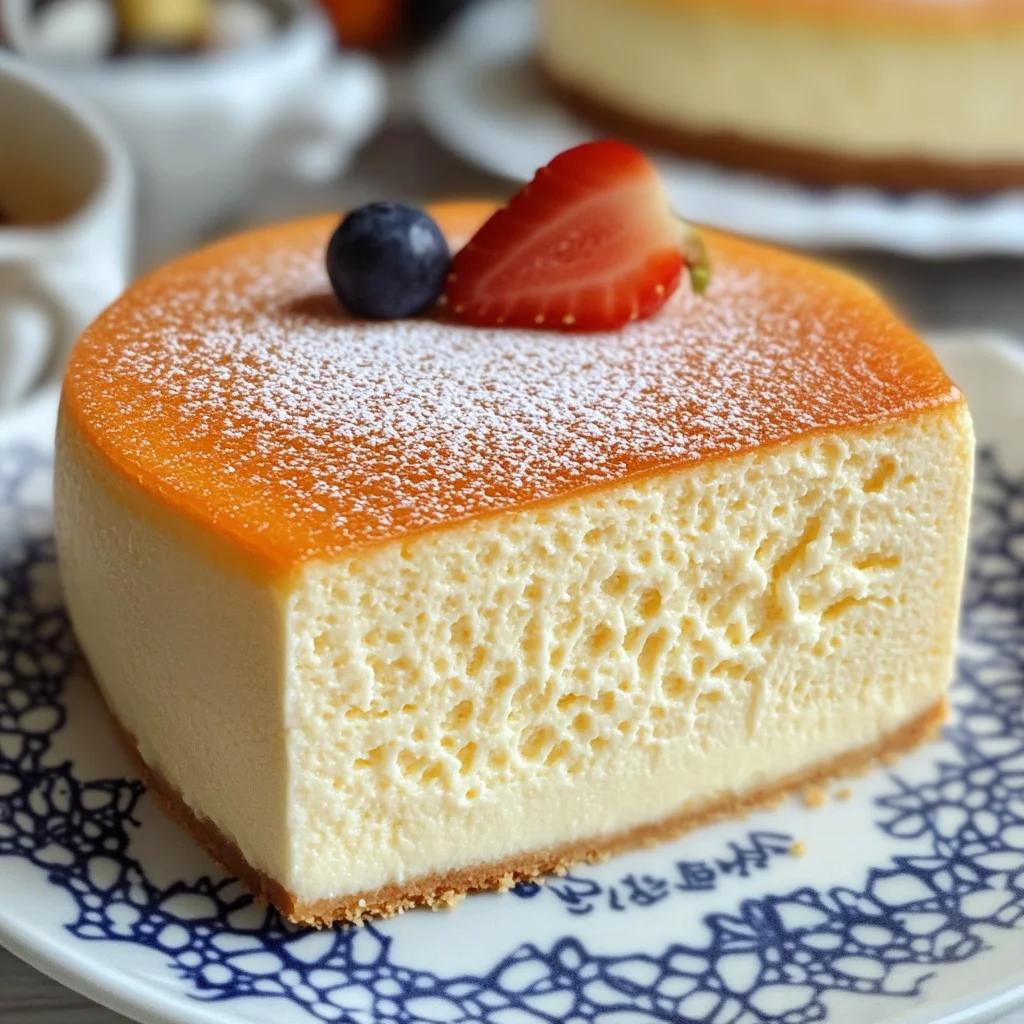
If you’re looking for a dessert that will impress your family and friends without taking up your entire day, then this Easy Japanese Cotton Cheesecake Recipe is just what you need! This delightful treat is incredibly fluffy and light, making it perfect for any occasion—from busy weeknights to special gatherings. There’s something magical about how simple ingredients can come together to create a cheesecake that’s not only delicious but also feels like a warm hug in every bite.
I absolutely love sharing this recipe because it’s one of those desserts that can elevate any meal. Whether you’re celebrating a birthday or simply indulging yourself after a long day, this cheesecake will surely be the star of the show!
Why You’ll Love This Recipe
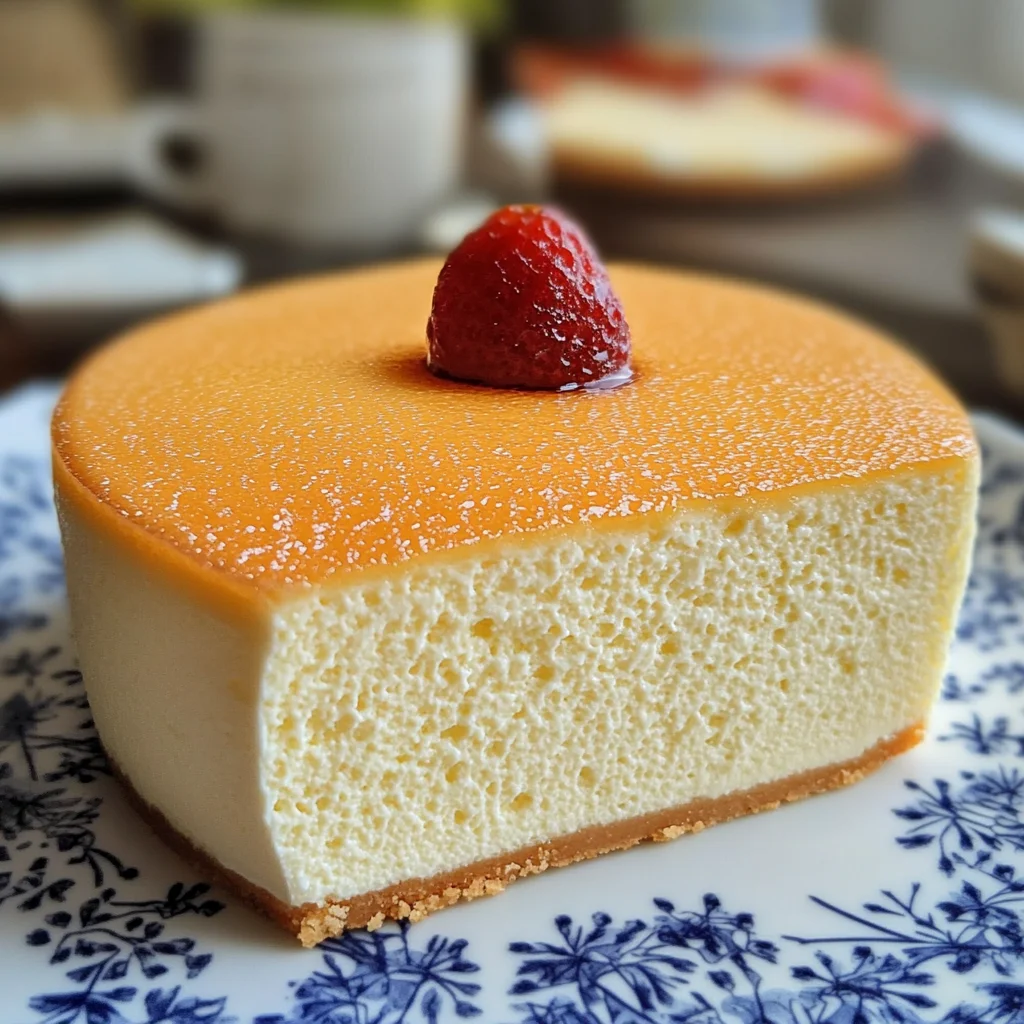
- Fluffy Texture: This cheesecake is known for its airy, cloud-like texture, which makes it feel lighter than traditional cheesecakes.
- Easy Preparation: You don’t need to be a baking expert to whip this up! The steps are straightforward, making it accessible to everyone.
- Family Favorite: Kids and adults alike adore the subtle sweetness and creamy flavor; it’s sure to please all palates.
- Make-Ahead Option: You can prepare this cheesecake in advance, making it perfect for parties or busy weekdays.
- Versatile Flavor: It pairs beautifully with fresh fruits or sauces, allowing you to customize it to your taste!
Ingredients You’ll Need
Let’s gather some simple, wholesome ingredients to create this wonderful cheesecake. Don’t worry; most of these items are likely already in your kitchen!
For the Cheesecake Batter
- 1 cup cream cheese (softened)
- 4 tablespoons butter (softened)
- 7 tablespoons milk
- 6 large eggs (separated)
- 1.5 tablespoons lemon juice
- 2 teaspoons vanilla extract
- 3/4 cup granulated sugar (divided)
- 3/4 cup cake flour
- 2.5 tablespoons corn starch
- 1/4 teaspoon salt
- 1/4 teaspoon cream of tartar
Variations
One of the great things about this Easy Japanese Cotton Cheesecake Recipe is how flexible it can be! Feel free to experiment with different flavors and additions.
- Add Citrus Zest: Incorporate some lemon or orange zest into the batter for an extra burst of flavor.
- Try Different Extracts: Swap out vanilla extract for almond or coconut extract for a unique twist.
- Mix in Fruit: Gently fold in some fresh berries or mashed bananas into the batter before baking for added sweetness.
- Top It Off: Serve with whipped coconut cream or a drizzle of fruit sauce for an elegant presentation.
How to Make Easy Japanese Cotton Cheesecake Recipe
Step 1: Prepare Your Pan
Start by greasing and lining an 8-inch waterproof springform tin. Wrapping the outside with tinfoil helps prevent water from seeping in during baking. This step is crucial as it ensures your cheesecake bakes evenly without becoming soggy.
Step 2: Melt the Base Ingredients
In a microwave-safe bowl, melt together the cream cheese, butter, and milk for about 1 ½ minutes. Whisk until smooth—this creates a creamy base that sets the stage for your delicious cheesecake.
Step 3: Mix in Egg Yolks and Flavorings
Add in the egg yolks, lemon juice, vanilla extract, and half of the sugar into your melted mixture. Stir well until everything is combined. This step ensures that all those lovely flavors meld together beautifully.
Step 4: Incorporate Dry Ingredients
Sift in the cake flour, corn starch, and salt into your creamy mixture. Whisk until no lumps remain; this helps create that light texture we all love in cotton cheesecakes.
Step 5: Whip Those Egg Whites
Using a mixer on medium speed, whip the egg whites until soft peaks form before gradually adding cream of tartar and then the remaining sugar. Continue whipping until you achieve glossy stiff peaks. This process is key—it gives your cheesecake its signature fluffiness!
Step 6: Fold Meringue Into Batter
Gently fold one-third of the meringue into your cream cheese batter first; this lightens up the mixture. Then carefully fold in the rest without deflating it too much—this will maintain that airy quality we’re aiming for.
Step 7: Bake with Care
Pour your batter into the prepared pan and place it inside a larger dish filled with boiling water halfway up the sides of your cake pan. Baking using a water bath ensures even cooking while keeping your cheesecake moist.
Step 8: Perfect Your Bake
Bake on the bottom rack at 400°F (200°C) for 18 minutes before lowering the temperature to 320°F (160°C) for another 12 minutes. Turning off the oven afterward while letting it cool slightly helps prevent cracking on top.
Step 9: Cool and Serve
After cooling at room temperature, run a knife around the edge before gently releasing from the springform pan onto a cake plate. Slice into generous pieces and enjoy every fluffy bite!
This Easy Japanese Cotton Cheesecake Recipe is bound to become one of your go-to desserts! Happy baking!
Pro Tips for Making Easy Japanese Cotton Cheesecake Recipe
Making the perfect Japanese cotton cheesecake can feel daunting, but with a few handy tips, you’ll be well on your way to achieving that light and fluffy texture we all adore!
-
Use room temperature ingredients: Bringing your cream cheese, butter, and eggs to room temperature ensures they blend seamlessly, resulting in a smooth batter without lumps.
-
Whip egg whites carefully: When whipping the egg whites, take care not to overbeat them. You want soft peaks that hold their shape; overwhipped whites can lead to a dry cheesecake.
-
Don’t skip the water bath: The water bath helps regulate the temperature while baking, preventing cracks and promoting even cooking. It’s key for that signature soft texture!
-
Cool gradually: Allowing the cheesecake to cool slowly in the oven prevents sudden temperature changes that can cause it to shrink or crack. Be patient; good things come to those who wait!
-
Serve chilled: For the best flavor and texture, chill your cheesecake in the refrigerator for a few hours before serving. This allows the flavors to meld beautifully and enhances that delightful creaminess.
How to Serve Easy Japanese Cotton Cheesecake Recipe
Presentation is everything when it comes to serving this delightful dessert! Here are some ideas to make your cheesecake not only taste amazing but look appealing too.
Garnishes
- Powdered sugar: A light dusting of powdered sugar adds an elegant touch while providing a subtle sweetness that complements the cheesecake’s flavor.
- Fresh berries: Top with strawberries, blueberries, or raspberries for a pop of color and freshness. The tartness of berries balances the rich creaminess perfectly.
- Whipped coconut cream: For a dairy-free option, serve with a dollop of whipped coconut cream. Its lightness enhances the airy texture of the cheesecake.
Side Dishes
- Matcha tea: The earthy flavors of matcha provide a beautiful contrast to the sweetness of the cheesecake. Serve warm or chilled for an authentic Japanese experience.
- Green tea ice cream: This creamy treat pairs wonderfully with cotton cheesecake, adding an extra layer of flavor while keeping everything light and refreshing.
- Fruit salad: A mixture of seasonal fruits offers a refreshing side that brightens up each bite of cheesecake. Opt for citrus fruits for added zest!
- Chilled jasmine tea: A fragrant cup of jasmine tea complements the delicate flavors of your cheesecake and provides a soothing beverage option alongside dessert.
With these tips and serving suggestions, you’re sure to impress everyone at your next gathering with this Easy Japanese Cotton Cheesecake Recipe! Enjoy every fluffy bite!
Make Ahead and Storage
This Easy Japanese Cotton Cheesecake is not only a delight to eat but also perfect for meal prep! You can make it ahead of time and store it, ensuring you have a delicious treat ready whenever you crave something sweet.
Storing Leftovers
- Allow the cheesecake to cool completely before storing.
- Cover the cheesecake with plastic wrap or place it in an airtight container.
- Store in the refrigerator for up to 3 days for optimal freshness.
Freezing
- Slice the cheesecake into portions for easy serving.
- Wrap each slice tightly with plastic wrap, then place them in a freezer-safe bag or container.
- Freeze for up to 2 months. To enjoy, simply thaw overnight in the refrigerator.
Reheating
- For best results, allow frozen slices to thaw in the fridge overnight.
- If desired, warm individual slices gently in the microwave for about 10-15 seconds before serving. This will enhance the creamy texture!
FAQs
Here are some common questions that might arise while making this delightful dessert.
Can I make this Easy Japanese Cotton Cheesecake Recipe without cream cheese?
Yes! You can substitute cream cheese with a dairy-free cream cheese alternative for a similar texture and taste.
How do I know when my Easy Japanese Cotton Cheesecake is done baking?
The cheesecake should be lightly golden on top and have a slight jiggle in the center when you remove it from the oven. It will continue to set as it cools.
Can I use different flavors in my cheesecake?
Absolutely! You can incorporate flavors like matcha, chocolate, or fruit purees into your batter to customize your Japanese Cotton Cheesecake.
What can I serve with Easy Japanese Cotton Cheesecake?
This cheesecake pairs wonderfully with fresh fruit, whipped coconut cream, or a light dusting of powdered sugar.
Final Thoughts
I’m so glad you took the time to explore this recipe for Easy Japanese Cotton Cheesecake! It’s such a special dessert that brings joy and lightness to any occasion. I hope you find joy in every step of making it and delight in sharing (or enjoying) this fluffy masterpiece. Remember, cooking is all about love and creativity—so get out there and create something delicious!
Easy Japanese Cotton Cheesecake
Indulge in the delightful experience of creating your own Easy Japanese Cotton Cheesecake, a dessert that is as light and fluffy as a cloud! This simple yet elegant cheesecake is perfect for any occasion, from casual weeknight dinners to festive celebrations. With its airy texture and subtle sweetness, this cheesecake will surely impress your family and friends. Plus, it’s easy to prepare, making it accessible for bakers of all skill levels. The beauty of this recipe lies in its versatility—customize it with your favorite flavors or serve it with fresh fruits for an irresistible treat.
- Prep Time: 20 minutes
- Cook Time: 30 minutes
- Total Time: 50 minutes
- Yield: Serves 8
- Category: Dessert
- Method: Baking
- Cuisine: Japanese
Ingredients
- 1 cup cream cheese (softened)
- 4 tablespoons butter (softened)
- 7 tablespoons milk
- 6 large eggs (separated)
- 1.5 tablespoons lemon juice
- 2 teaspoons vanilla extract
- 3/4 cup granulated sugar (divided)
- 3/4 cup cake flour
- 2.5 tablespoons corn starch
- 1/4 teaspoon salt
- 1/4 teaspoon cream of tartar
Instructions
- Grease and line an 8-inch springform pan with tinfoil around the outside.
- Melt cream cheese, butter, and milk together in a microwave-safe bowl until smooth.
- Stir in egg yolks, lemon juice, vanilla extract, and half the sugar until combined.
- Sift in cake flour, corn starch, and salt; whisk until smooth.
- Whip egg whites to soft peaks; gradually add cream of tartar and remaining sugar until stiff peaks form.
- Gently fold meringue into batter in two additions.
- Pour batter into the prepared pan; place it in a water bath.
- Bake at 400°F for 18 minutes, then lower to 320°F for an additional 12 minutes.
- Cool slowly in the oven before transferring to a plate.
Nutrition
- Serving Size: 1 slice (90g)
- Calories: 190
- Sugar: 10g
- Sodium: 150mg
- Fat: 11g
- Saturated Fat: 6g
- Unsaturated Fat: 4g
- Trans Fat: 0g
- Carbohydrates: 19g
- Fiber: <1g
- Protein: 5g
- Cholesterol: 105mg


Leave a Comment