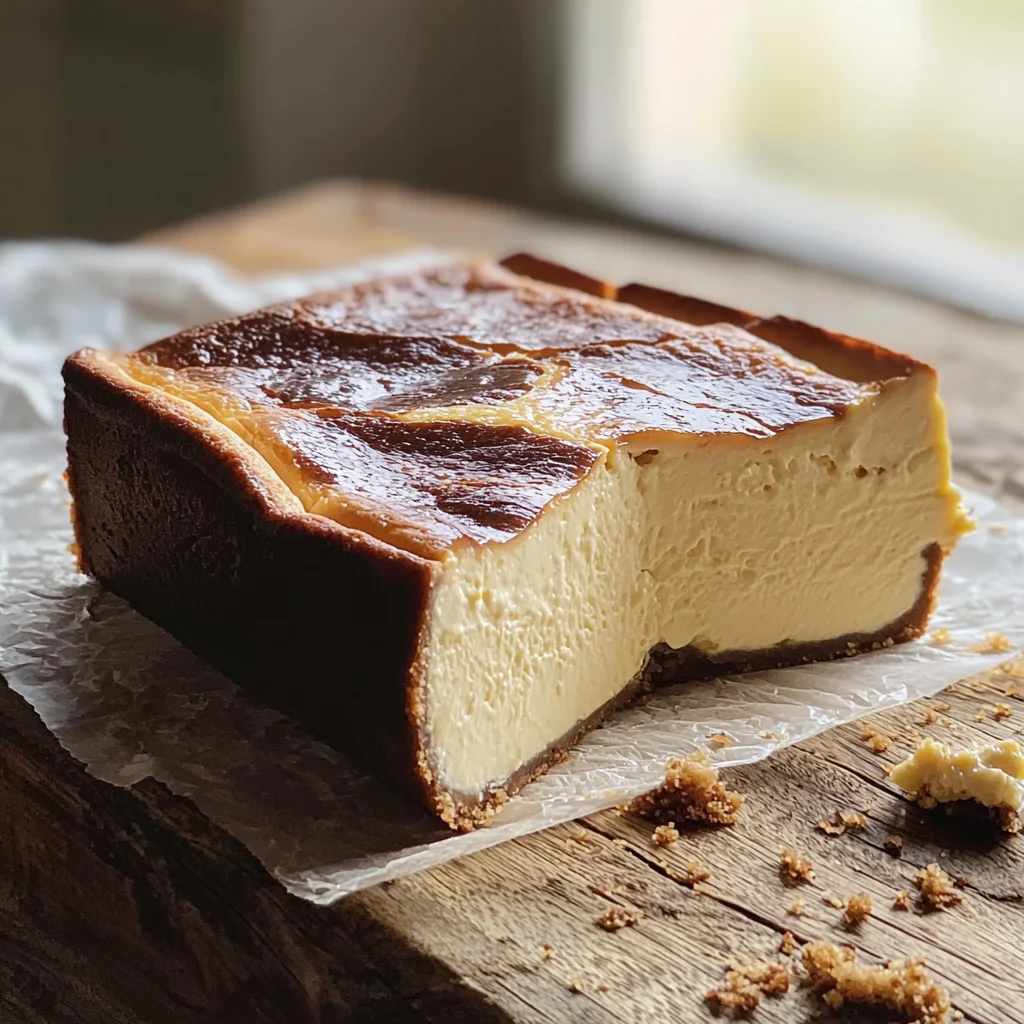
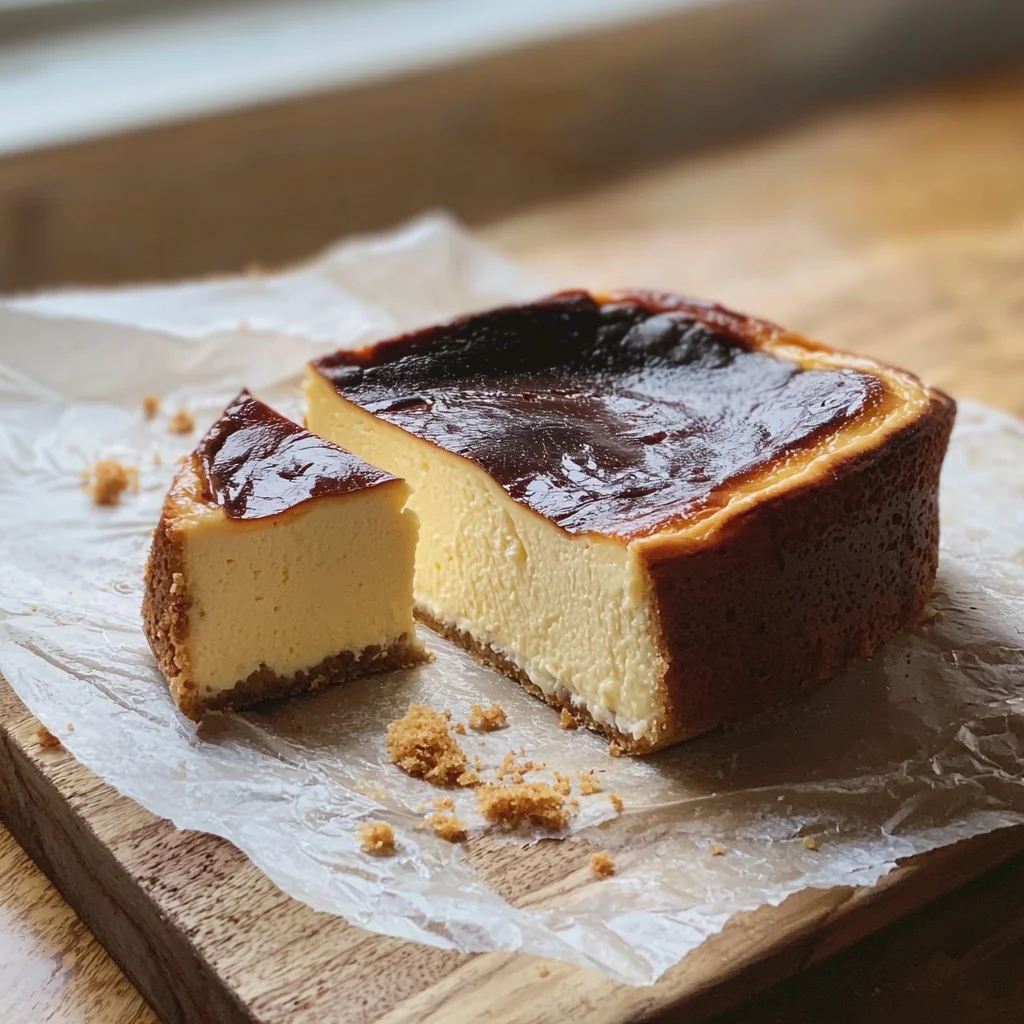
If you’re looking for a delightful dessert that’s sure to impress, this Burnt Basque Cheesecake in a Loaf Pan is just the ticket! Its creamy texture and caramelized top make it a standout treat for any occasion. Whether you’re celebrating a special event or simply want to indulge on a busy weeknight, this cheesecake fits the bill perfectly. It’s easy to whip up and even easier to enjoy with friends and family.
What makes this recipe extra special is its ability to shine in both casual and festive settings. Imagine serving slices of this luscious cheesecake at your next gathering or enjoying it as a sweet end to a comforting meal.
Why You’ll Love This Recipe
- Easy to Make: With just a few simple steps, you can create a stunning dessert that’s sure to impress.
- Small-Batch Delight: Perfectly portioned for small gatherings, leaving no leftovers but plenty of satisfied smiles.
- Creamy Goodness: The rich custard-like center combined with the burnt top creates an irresistible flavor and texture.
- Make-Ahead Friendly: Chill it overnight for the best flavor development; it’s ready when you are!
- Versatile Treat: Great for any occasion, from cozy family nights to elegant dinner parties.
Ingredients You’ll Need
Creating this delicious cheesecake requires just a handful of simple, wholesome ingredients that you likely have on hand. Here’s what you’ll need:
For the Cheesecake
- 1 1/2 cups cream cheese, softened (full-fat)
- 1/2 cup granulated sugar
- 2 large eggs, room temperature
- 3/4 cup heavy cream
- 1/2 teaspoon vanilla extract
- 1/8 teaspoon salt
- 1 tablespoon all-purpose flour
Variations
One of the best things about this Burnt Basque Cheesecake is its flexibility! Here are some fun variations you can try:
- Add Some Zest: Incorporate lemon or orange zest for a refreshing citrus twist that brightens up the flavors.
- Go Nutty: Mix in some crushed nuts, like pistachios or almonds, into the batter for added texture and flavor.
- Chocolate Lovers Unite: Swirl in some melted chocolate before baking for an indulgent chocolate version of this classic dessert.
- Fruit Topping: Top your cooled cheesecake with fresh berries or caramelized fruit for an extra layer of sweetness.
How to Make Burnt Basque Cheesecake in a Loaf Pan
Step 1: Preheat Your Oven
Preheat your oven to 400°F (200°C). This high temperature is essential as it helps develop that gorgeous caramelized top we love while keeping the center deliciously creamy.
Step 2: Prepare Your Loaf Pan
Line your loaf pan with parchment paper, ensuring there’s some overhang. This little trick makes removing the cheesecake from the pan much easier once it’s done baking!
Step 3: Beat the Cream Cheese and Sugar
In a large mixing bowl, beat together the softened cream cheese and granulated sugar until it’s very smooth and fluffy. This step is crucial because it incorporates air into the mixture, giving your cheesecake that light texture.
Step 4: Add Eggs One at a Time
Add each egg one at a time, mixing well after each addition. This helps achieve that silky custard-like consistency that’s characteristic of Basque cheesecakes.
Step 5: Pour in Cream and Flavoring
Next, pour in the heavy cream along with vanilla extract and salt. Beat until everything is fully incorporated; you want that smoothness!
Step 6: Fold in Flour
Sift in the flour gently and fold until just combined. Be careful not to overmix; we want our batter light but still cohesive.
Step 7: Fill Your Loaf Pan
Pour the batter into your prepared loaf pan. Give it a gentle tap on the counter to release any air bubbles—this will help create that perfect texture inside.
Step 8: Bake It Up!
Bake for about 40–45 minutes until the top is deeply golden brown but still slightly jiggly in the center. This contrast is what gives it that beautiful burnt look while keeping it creamy inside.
Step 9: Cool & Chill
Let your cheesecake cool down to room temperature first, then refrigerate for at least four hours—overnight is best! Chilling allows those flavors to meld beautifully. When you’re ready, slice and serve this creamy delight!
Pro Tips for Making Burnt Basque Cheesecake in a Loaf Pan
Creating the perfect Burnt Basque Cheesecake can be a delightful experience, and these tips will help you achieve cheesecake perfection!
-
Use room temperature ingredients: Starting with cream cheese and eggs at room temperature ensures a smoother batter that blends easily, resulting in a creamy texture.
-
Don’t overmix the batter: Mixing just until combined after adding the flour keeps your cheesecake light and prevents it from becoming dense.
-
Check for doneness carefully: The center should jiggle slightly when you take it out of the oven. Overbaking can lead to a dry cheesecake, so keep an eye on the time!
-
Let it cool slowly: Allowing your cheesecake to cool at room temperature before refrigerating helps maintain its silky custard-like texture.
-
Refrigerate overnight: Giving your cheesecake ample chilling time enhances its flavor and allows it to set perfectly, making slicing much easier.
How to Serve Burnt Basque Cheesecake in a Loaf Pan
Serving your Burnt Basque Cheesecake creatively can make it even more inviting. Here are some ideas to elevate your presentation!
Garnishes
- Fresh berries: A handful of mixed berries provides a pop of color and a tart contrast that complements the richness of the cheesecake.
- Whipped cream: A dollop of lightly sweetened whipped cream adds an airy touch that balances the dense texture of the cake.
Side Dishes
- Coffee or espresso: The rich, bitter notes of coffee pair beautifully with the sweetness of the cheesecake, creating a delightful contrast.
- Chocolate sauce: Drizzling some warm chocolate sauce over each slice adds indulgence and enhances the dessert experience.
- Fruit compote: A simple fruit compote made from seasonal fruits brings freshness and acidity that cuts through the richness.
- Ice cream: Serving a scoop of vanilla or berry-flavored ice cream alongside offers a creamy complement that’s always a crowd-pleaser.
Make Ahead and Storage
This Burnt Basque Cheesecake in a Loaf Pan is not only a delightful treat but also perfect for meal prep. You can make it ahead of time and store it for later enjoyment!
Storing Leftovers
- Store any leftover cheesecake in an airtight container in the refrigerator.
- It will keep well for up to 3 days.
- For best results, slice the cheesecake just before serving.
Freezing
- Wrap the cooled cheesecake tightly in plastic wrap or aluminum foil.
- Place it in a freezer-safe container or bag to prevent freezer burn.
- It can be frozen for up to 2 months.
Reheating
- Thaw the cheesecake overnight in the refrigerator before serving.
- If desired, you can gently warm individual slices in the microwave for a few seconds.
FAQs
Can I make Burnt Basque Cheesecake in a Loaf Pan without heavy cream?
Yes! You can substitute heavy cream with coconut cream or any non-dairy cream alternative to achieve a similar creamy texture.
How long does Burnt Basque Cheesecake in a Loaf Pan last?
When stored properly in the refrigerator, this cheesecake will last for about 3 days. For longer storage, consider freezing it.
What makes Burnt Basque Cheesecake different from regular cheesecake?
Burnt Basque Cheesecake is unique due to its caramelized top and creamy custard-like center, which gives it a distinct flavor and texture compared to traditional cheesecakes.
Can I use a different pan instead of a loaf pan?
Absolutely! While this recipe is designed for a loaf pan, you can use an 8-inch round cake pan. Just adjust the baking time as needed.
Final Thoughts
I hope you enjoy making this Burnt Basque Cheesecake in a Loaf Pan as much as I do! It’s truly special with its rich flavors and beautiful presentation. Don’t hesitate to share your creations and thoughts—happy baking!
Burnt Basque Cheesecake in a Loaf Pan
Indulge in the creamy richness of Burnt Basque Cheesecake made effortlessly in a loaf pan. This delightful dessert boasts a beautifully caramelized top that contrasts perfectly with its silky custard-like center. Perfect for both casual evenings and festive celebrations, this cheesecake is easy to prepare and even easier to enjoy. With just a handful of simple ingredients, you can create a stunning treat that will impress your guests or satisfy your sweet cravings. Serve it chilled with fresh berries or a drizzle of chocolate sauce for an elegant touch.
- Prep Time: 15 minutes
- Cook Time: 45 minutes
- Total Time: 1 hour
- Yield: Approximately 10 servings 1x
- Category: Dessert
- Method: Baking
- Cuisine: European
Ingredients
- 1 1/2 cups cream cheese, softened
- 1/2 cup granulated sugar
- 2 large eggs, room temperature
- 3/4 cup heavy cream
- 1/2 teaspoon vanilla extract
- 1/8 teaspoon salt
- 1 tablespoon all-purpose flour
Instructions
- Preheat your oven to 400°F (200°C) and line a loaf pan with parchment paper.
- In a large bowl, beat together the cream cheese and sugar until smooth and fluffy.
- Add eggs one at a time, mixing well after each addition.
- Pour in the heavy cream, vanilla extract, and salt; mix until fully combined.
- Gently fold in the flour until just combined.
- Pour the batter into the prepared loaf pan and tap gently to remove air bubbles.
- Bake for 40–45 minutes until the top is golden brown and the center remains slightly jiggly.
- Allow to cool to room temperature before refrigerating for at least four hours or overnight.
Nutrition
- Serving Size: 1 slice (90g)
- Calories: 300
- Sugar: 17g
- Sodium: 220mg
- Fat: 24g
- Saturated Fat: 14g
- Unsaturated Fat: 9g
- Trans Fat: 0g
- Carbohydrates: 22g
- Fiber: 0g
- Protein: 5g
- Cholesterol: 100mg


Leave a Comment