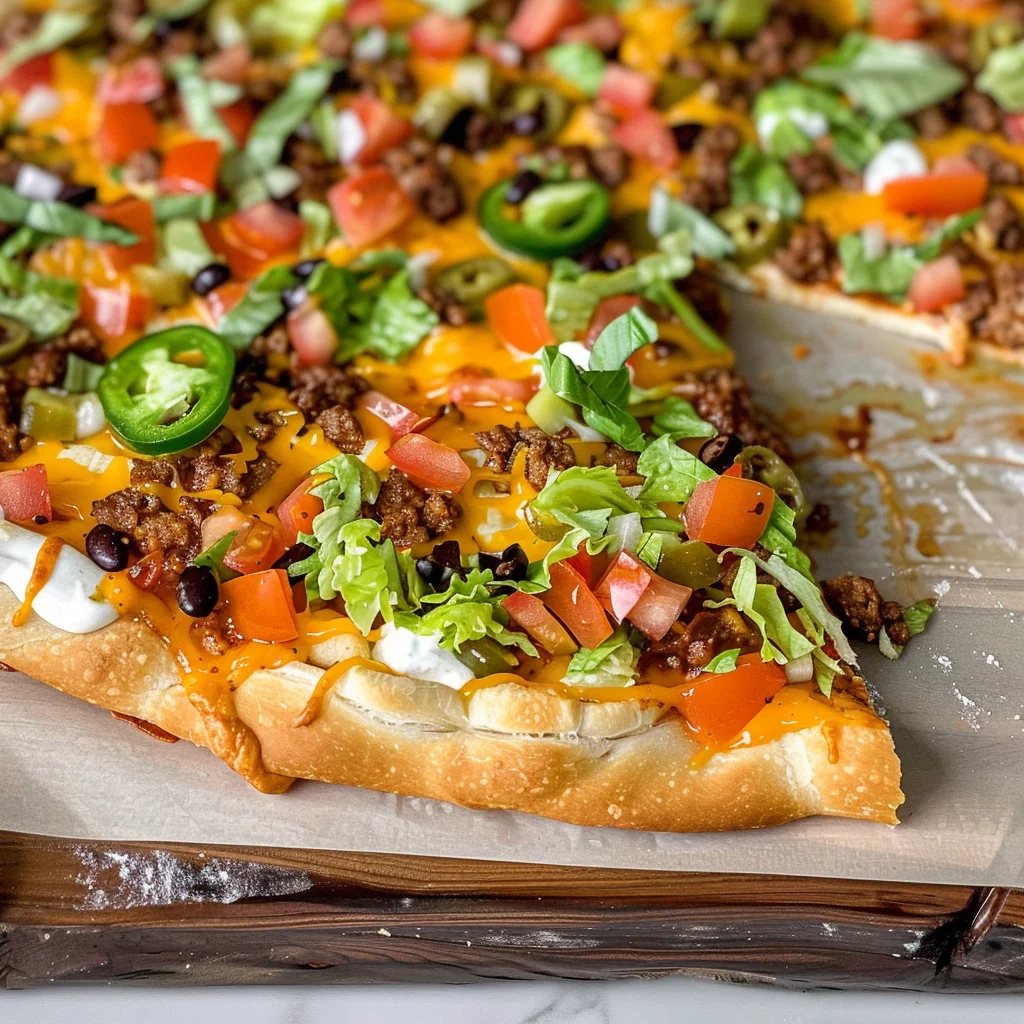
If you’re looking for a crowd-pleasing appetizer that combines the best of both worlds, let me introduce you to Taco Pizza Appetizer: A Delightful Fusion of Flavors. This dish is not only easy to whip up, but it also brings the savory goodness of tacos together with the cheesy, comforting vibes of pizza. It’s perfect for busy weeknights when you need something quick or for family gatherings where everyone can enjoy a slice (or two!).
The beauty of this recipe lies in its versatility and the way it caters to different tastes. Whether you’re hosting game night or just want a fun meal at home, this taco pizza will surely become a favorite in your household.
Why You’ll Love This Recipe
- Quick and Easy: With just 20 minutes from start to finish, you’ll have a delicious appetizer ready in no time!
- Family-Friendly: Kids and adults alike will love this fun twist on two classic favorites.
- Customizable Toppings: Make it your own! Add jalapeños for heat or extra veggies for a fresh crunch.
- Perfect for Any Occasion: Whether it’s game day, a potluck, or a cozy dinner at home, this dish fits right in.
- Make-Ahead Convenience: Prep the filling beforehand and assemble when you’re ready to bake!

Ingredients You’ll Need
These ingredients are simple and wholesome, making it easy to create a delightful appetizer that everyone will enjoy. Gather these items to get started on your Taco Pizza Appetizer:
For the Crust
- 8 ounces crescent rolls (1 refrigerated tube)
For the Filling
- 4 ounces cream cheese, softened
- 4 ounces sour cream
- 1 pound ground beef (or ground turkey for a leaner option)
- 1 taco seasoning packet
For Toppings
- ½ cup diced tomatoes
- ½ cup shredded cheddar cheese
- ½ cup shredded mozzarella cheese
- ½ cup shredded lettuce
- Jalapeños, chilies, or any other toppings you like
Variations
What I adore about this recipe is its flexibility! You can easily modify it to suit your taste preferences or dietary needs. Here are some fun variations to try:
- Swap the protein: Use ground turkey, chicken, or even black beans for a vegetarian option.
- Go gluten-free: Substitute crescent rolls with gluten-free dough or tortillas.
- Add some spice: Incorporate diced green chilies or hot sauce into the filling for an extra kick.
- Change up the cheese: Experiment with different cheeses like pepper jack for added flavor.
How to Make Taco Pizza Appetizer: A Delightful Fusion of Flavors
Step 1: Preheat Your Oven
Preheat your oven according to the instructions on the crescent roll package. This ensures that your crust gets perfectly golden and crispy as soon as it goes in.
Step 2: Prepare the Crust
Unroll the crescent roll dough onto a baking sheet lined with parchment paper. Carefully press the seams together to form one cohesive crust. This creates a sturdy base for all those delicious toppings!
Step 3: Cook the Meat
In a skillet over medium heat, cook your ground beef (or turkey) until browned. Drain any excess fat before adding in your taco seasoning along with water as directed on the packet. Stir well and let it simmer so all those flavors meld together beautifully.
Step 4: Mix the Creamy Base
In a mixing bowl, combine softened cream cheese and sour cream until smooth. This creamy mixture adds richness to each bite and acts as a delicious base layer.
Step 5: Assemble Your Pizza
Spread the creamy mixture evenly over the crust. Top it off with your seasoned meat, followed by diced tomatoes, cheddar cheese, and mozzarella cheese. Don’t forget to sprinkle on additional toppings like jalapeños if you’re feeling adventurous!
Step 6: Bake to Perfection
Place your assembled pizza in the preheated oven and bake according to crescent roll instructions—usually around 10-12 minutes—until golden brown and bubbly.
Step 7: Add Fresh Toppings
Once baked, remove from oven and let cool slightly before adding shredded lettuce on top for freshness. Serve warm and watch it disappear in no time!
This Taco Pizza Appetizer is sure to be an instant hit at any gathering—enjoy every cheesy bite!
Pro Tips for Making Taco Pizza Appetizer: A Delightful Fusion of Flavors
Making this Taco Pizza Appetizer can be a breeze with a few handy tips!
-
Preheat your oven: Ensuring your oven is at the right temperature before baking helps achieve that perfect golden crust. It makes all the difference in texture and flavor!
-
Use room temperature cream cheese: This allows for easier mixing with the sour cream, resulting in a smoother and creamier base that blends well with the other ingredients.
-
Customize your toppings: Feel free to mix and match toppings based on personal preferences. Adding black olives, corn, or even avocado can create exciting flavors and textures!
-
Let it cool slightly before serving: Allowing the taco pizza to rest for a few minutes after baking helps set the layers and makes slicing easier, ensuring you get perfect pieces every time.
-
Serve with dipping sauces: Consider providing salsa, guacamole, or ranch dressing on the side. These condiments add an extra layer of flavor and enhance the overall experience!
How to Serve Taco Pizza Appetizer: A Delightful Fusion of Flavors
Presentation is key when serving your delicious Taco Pizza Appetizer! Here are some creative ideas to make it visually appealing.
Garnishes
- Chopped cilantro: A sprinkle of fresh cilantro adds a burst of color and freshness that complements the Mexican flavors beautifully.
- Sour cream drizzle: Drizzling a little sour cream over the top not only looks great but also adds an extra creamy element to each bite.
Side Dishes
- Guacamole: Creamy and rich, this classic dip pairs perfectly with the taco pizza, offering a delightful contrast in texture.
- Mexican street corn (Elote): Grilled corn on the cob topped with mayo, cheese, and spices brings a sweet and savory element that enhances the meal.
- Chips and salsa: Crunchy tortilla chips served alongside fresh salsa provide a satisfying crunch that balances well with the soft taco pizza.
- Black bean salad: A refreshing mix of black beans, corn, diced peppers, and lime dressing offers a zesty side that complements the flavors of your appetizer wonderfully.
Make Ahead and Storage
This Taco Pizza Appetizer is perfect for meal prep, making it easy to enjoy throughout the week or for entertaining guests. Here are some tips for storing and reheating your delicious creation.
Storing Leftovers
- Allow the pizza to cool completely before storing.
- Place leftovers in an airtight container and refrigerate.
- Consume within 3-4 days for optimal freshness.
Freezing
- If you want to freeze portions, cut the pizza into individual slices.
- Wrap each slice tightly in plastic wrap or aluminum foil.
- Place wrapped slices in a freezer-safe bag or container. They can be frozen for up to 2 months.
Reheating
- Preheat your oven to 350°F (175°C).
- Place the pizza on a baking sheet and cover with foil to prevent drying out.
- Bake for about 10-15 minutes, or until heated through. Alternatively, you can microwave individual slices for about 30-45 seconds.
FAQs
Can I make Taco Pizza Appetizer vegetarian?
Absolutely! You can easily substitute the ground beef with a plant-based protein or even just load up on veggies like bell peppers, mushrooms, and corn for a hearty vegetarian option.
How long does Taco Pizza Appetizer last in the fridge?
When properly stored in an airtight container, Taco Pizza Appetizer can last up to 3-4 days in the refrigerator. Be sure to check for freshness before consuming!
What is the best way to serve Taco Pizza Appetizer?
Taco Pizza Appetizer is best served warm, straight from the oven. Pair it with sour cream or guacamole on the side for extra flavor!
Final Thoughts
I hope you enjoy making this Taco Pizza Appetizer as much as I do! It’s a fun and versatile dish that brings together two beloved favorites into one delicious bite. Whether you’re serving it at a party or enjoying it during family movie night, this recipe is sure to impress. Happy cooking!
Taco Pizza Appetizer: A Delightful Fusion of Flavors

Taco Pizza Appetizer: A Delightful Fusion of Flavors is the perfect dish to impress your guests or satisfy your family’s cravings. This easy-to-make appetizer combines the best of taco and pizza worlds, bringing together seasoned ground beef, creamy layers, and a medley of fresh toppings on a flaky crescent roll crust. Ideal for game nights, family gatherings, or cozy dinners at home, this dish is not only quick to prepare but also completely customizable to suit various tastes. With its fun presentation and delicious flavors, it’s sure to be a hit at any occasion!
- Prep Time: 10 minutes
- Cook Time: 12 minutes
- Total Time: 22 minutes
- Yield: Serves 8
- Category: Appetizers
- Method: Baking
- Cuisine: Mexican
Ingredients
- 8 ounces crescent rolls
- 4 ounces cream cheese
- 4 ounces sour cream
- 1 pound ground beef
- 1 taco seasoning packet
- ½ cup diced tomatoes
- ½ cup shredded cheddar cheese
- ½ cup shredded mozzarella cheese
- ½ cup shredded lettuce
- Jalapeños (optional)
Instructions
- Preheat oven as per crescent roll package instructions.
- Roll out crescent dough onto a parchment-lined baking sheet, sealing seams to form a crust.
- In a skillet, brown ground beef; drain fat and mix in taco seasoning with water according to packet directions.
- In a bowl, blend softened cream cheese and sour cream until smooth.
- Spread the creamy mixture over the crust, top with seasoned meat, tomatoes, cheeses, and optional jalapeños.
- Bake for 10-12 minutes until golden brown.
- Let cool slightly before adding shredded lettuce on top. Serve warm.
Nutrition
- Serving Size: 1 slice (100g)
- Calories: 290
- Sugar: 2g
- Sodium: 650mg
- Fat: 18g
- Saturated Fat: 9g
- Unsaturated Fat: 7g
- Trans Fat: 0g
- Carbohydrates: 25g
- Fiber: 2g
- Protein: 11g
- Cholesterol: 40mg



Leave a Comment