If you’re looking for a quick and delicious way to elevate your desserts, this Oreo Pie Crust recipe is just the thing! Whether it’s a busy weeknight treat or a family gathering, this crust is versatile enough to be the star of any dessert. I love how easy it is to whip up, and the rich chocolate flavor always leaves everyone wanting more. Plus, you can use it as a base for so many delicious fillings!
This Oreo pie crust is not only simple but also incredibly satisfying. It’s perfect for those who want to impress without spending hours in the kitchen. Trust me, once you try this no-fuss recipe, you’ll never want to go back to store-bought crusts again!
Why You’ll Love This Recipe
- Super Simple: With just two ingredients, making your own Oreo pie crust has never been easier!
- Family-Friendly: Kids and adults alike love the rich chocolatey flavor—it’s a hit at any gathering!
- Versatile Base: Use it for cheesecakes, pudding pies, or even ice cream cakes—your options are endless!
- Make-Ahead Convenience: Prepare it in advance and keep it ready for last-minute dessert prep.
- Decadent Flavor: The delightful combination of Oreos and butter creates a mouthwatering crust that elevates any dessert.
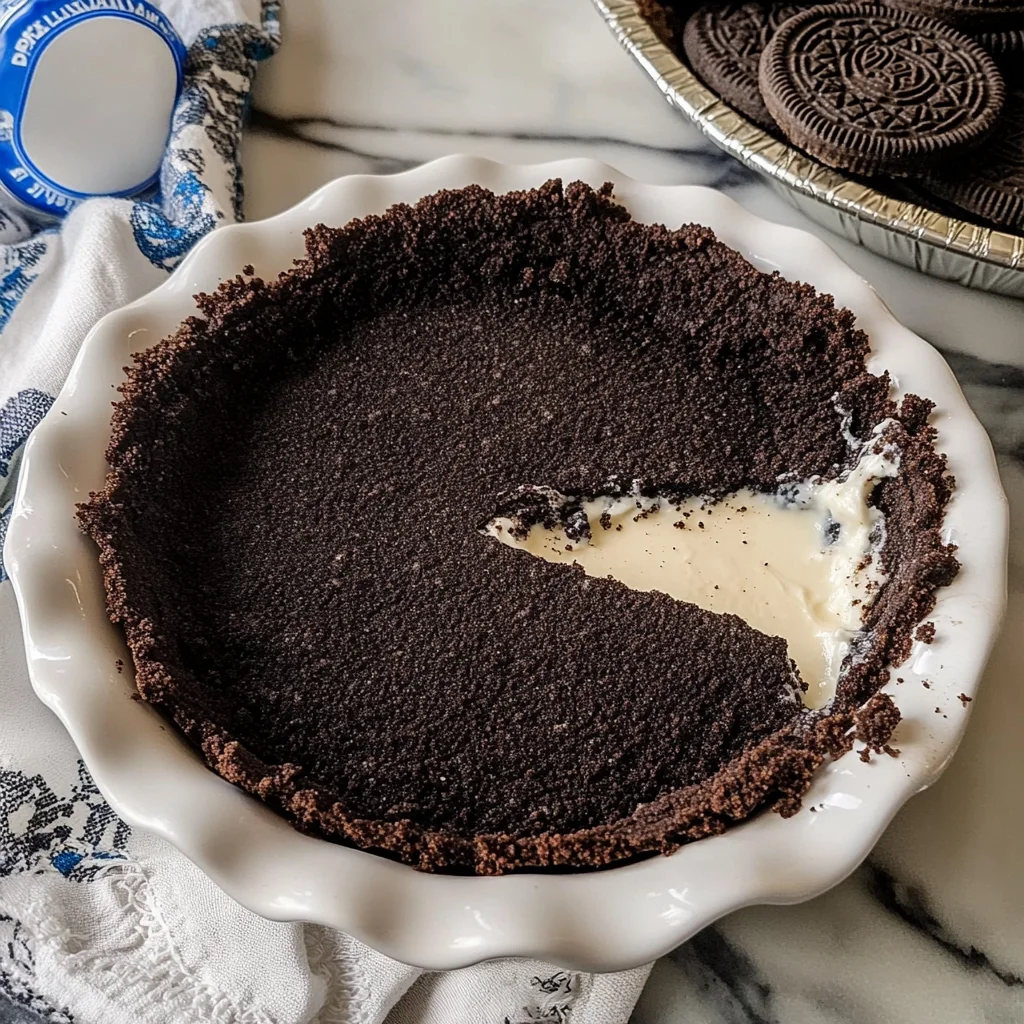
Ingredients You’ll Need
You’ll find that this recipe calls for just two simple and wholesome ingredients. It’s amazing what you can create with a little creativity and some pantry staples! Let’s gather what you need:
For the Crust
- 24 Oreo cookies (with filling)
- 5 tablespoons unsalted butter (melted)
Variations
One of the best parts about this Oreo pie crust recipe is how flexible it is! You can easily customize it to suit your taste or the occasion. Here are some fun variation ideas:
- Add nuts: Mix in some crushed nuts with the cookie crumbs for an extra crunch.
- Use gluten-free Oreos: Make this recipe gluten-free by opting for gluten-free Oreo cookies.
- Chocolate lovers delight: Replace regular Oreos with double-stuffed ones for an even richer flavor.
- Infuse some zest: Add a sprinkle of orange or mint extract to give your crust a unique twist.
How to Make Oreo Pie Crust Recipe
Step 1: Crush the Cookies
Start by placing your Oreos in a food processor. Pulse them until they resemble fine crumbs. Crushing them evenly is crucial because it helps create that perfect texture when combined with butter. If you don’t have a food processor, you can also place them in a zip-top bag and crush them with a rolling pin—fun for kids too!
Step 2: Mix with Butter
In a mixing bowl, combine the crushed Oreos with melted unsalted butter. Stir until everything is well combined. This mixture should hold together when pressed; if it feels too dry, add a touch more melted butter. This step ensures your crust will be both flavorful and hold its shape once set.
Step 3: Form the Crust
Press the Oreo mixture into the bottom and up the sides of a pie dish using your fingers or a flat-bottomed glass. Make sure it’s packed tightly and evenly so that every bite has that delightful chocolate flavor. This step is important because it creates a sturdy base for whatever delicious filling you choose!
Step 4: Chill or Bake
For a no-bake option, simply chill your crust in the refrigerator for about 30 minutes before adding your filling. If you prefer a crisper texture, bake it in a preheated oven at 350°F (175°C) for about 10 minutes, then let it cool before adding your filling. Baking enhances the flavors and gives that extra crunch we all love!
Now you’re ready to fill this scrumptious Oreo pie crust with all sorts of delicious fillings! Enjoy every slice!
Pro Tips for Making Oreo Pie Crust Recipe
Creating the perfect Oreo Pie Crust is a breeze, and with these pro tips, you’ll elevate your crust to the next level!
-
Choose the right Oreos: Using regular Oreos instead of reduced-fat options will result in a richer, more flavorful crust. The extra filling provides added moisture and sweetness.
-
Melt butter properly: Ensure your butter is completely melted but not bubbling hot. This helps it mix well with the crushed cookies without cooking them.
-
Press firmly: When forming the crust in your pie dish, press down firmly to ensure it’s compact. A well-packed crust will hold together better when filled.
-
Chill before filling: If you’re making a no-bake pie, allow your crust to chill in the refrigerator for at least 30 minutes before adding any fillings. This helps it set and firm up nicely.
-
Experiment with flavors: Don’t hesitate to add a pinch of sea salt or a splash of vanilla extract to the melted butter for an extra flavor kick that complements the chocolatey goodness of Oreos.
How to Serve Oreo Pie Crust Recipe
This delectable Oreo Pie Crust is incredibly versatile! You can fill it with a variety of delightful fillings, and its rich chocolate flavor makes it a crowd-pleaser for any dessert lover.
Garnishes
- Whipped coconut cream: A light layer of whipped coconut cream on top adds a creamy texture that balances the richness of the pie.
- Chocolate shavings: Sprinkle some dark chocolate shavings over the top for an elegant touch that enhances both presentation and taste.
- Fresh berries: Add a handful of fresh strawberries or raspberries on top for a pop of color and a hint of tartness that pairs beautifully with sweet fillings.
Side Dishes
- Fruit salad: A refreshing fruit salad made with seasonal fruits complements the richness of the pie while adding bright flavors.
- Coffee or tea: Serving your dessert alongside a cup of coffee or herbal tea can provide a nice contrast and enhance the overall experience.
- Ice cream: A scoop of vanilla or mint ice cream served alongside will be a delightful pairing, adding creaminess and temperature contrast.
- Chocolate sauce: Drizzling some warm chocolate sauce over individual slices can take your dessert to heavenly levels!
With this easy-to-follow Oreo Pie Crust recipe, you’re all set to impress your family and friends at your next gathering. Enjoy baking (or assembling) this delicious treat!

Make Ahead and Storage
This Oreo Pie Crust recipe is fantastic for meal prep! You can whip it up in advance, allowing you to enjoy your pies and desserts with minimal fuss when you’re ready to serve. Here’s how to store and freeze your crust:
Storing Leftovers
- Keep any leftover pie crust in an airtight container.
- Store it at room temperature if you plan to use it within a couple of days.
- For longer storage, refrigerate it to maintain freshness.
Freezing
- Wrap the crust tightly in plastic wrap or aluminum foil.
- Place it in a freezer-safe bag or container.
- It can be frozen for up to 3 months. Just make sure to label the bag with the date!
Reheating
- If you’ve frozen the crust, let it thaw in the refrigerator overnight before using.
- To re-crisp the crust, bake it at 350°F (175°C) for about 5-7 minutes.
- Allow it to cool before filling with your favorite dessert.
FAQs
Here are some common questions that might pop up while making this delightful Oreo Pie Crust!
Can I use gluten-free Oreos for this Oreo Pie Crust Recipe?
Yes! Gluten-free Oreos work perfectly as a substitute, ensuring everyone can enjoy this delicious crust without any worries.
How do I make a no-bake Oreo Pie Crust?
For a no-bake version of the Oreo Pie Crust Recipe, simply combine crushed Oreos with melted butter, press into a pie dish, and chill in the fridge until set!
Can I add any flavors to the Oreo Pie Crust Recipe?
Absolutely! You can mix in some vanilla extract or even a pinch of sea salt with the butter for added flavor.
How thick should my Oreo Pie Crust be?
Aim for about 1/4 inch thickness for an ideal balance between crunch and softness. This thickness will hold up well under various fillings.
What are some good fillings for this Oreo Pie Crust?
This crust pairs beautifully with cheesecake mixtures, pudding, or ice cream. Feel free to get creative!
Final Thoughts
I hope you find joy in making this Oreo Pie Crust recipe as much as I do! Its easy preparation and delightful chocolatey flavor make it a perfect base for so many desserts. Whether you’re hosting friends or treating yourself, this pie crust will surely impress. Enjoy every bite, and don’t hesitate to share your creations—happy baking!
Oreo Pie Crust
Elevate your dessert game with this quick and easy Oreo Pie Crust recipe! Perfect for cheesecakes, pudding pies, or even ice cream cakes, this versatile crust brings a rich chocolate flavor that will impress at any gathering. With just two simple ingredients—crushed Oreos and melted butter—you can create a delicious foundation for countless desserts. Whether you choose to chill it for a no-bake treat or bake it for a slightly crispier texture, this crust is sure to become your go-to favorite. Plus, it’s so simple to make that you’ll never want to reach for store-bought options again!
- Prep Time: 10 minutes
- Cook Time: 10 minutes
- Total Time: 20 minutes
- Yield: Approximately 8 servings 1x
- Category: Dessert
- Method: Baking/Chilling
- Cuisine: American
Ingredients
- 24 Oreo cookies (with filling)
- 5 tablespoons unsalted butter (melted)
Instructions
- Crush the Oreo cookies in a food processor until they form fine crumbs. Alternatively, place them in a zip-top bag and crush with a rolling pin.
- In a mixing bowl, combine the crushed Oreos with melted butter and mix until well combined. The mixture should hold together when pressed.
- Press the Oreo mixture into the bottom and up the sides of a pie dish until tightly packed.
- Chill in the refrigerator for about 30 minutes for no-bake desserts, or bake at 350°F (175°C) for 10 minutes and let cool before filling.
Nutrition
- Serving Size: 1 slice (approximately 39g)
- Calories: 190
- Sugar: 8g
- Sodium: 100mg
- Fat: 10g
- Saturated Fat: 5g
- Unsaturated Fat: 4g
- Trans Fat: 0g
- Carbohydrates: 24g
- Fiber: 1g
- Protein: 2g
- Cholesterol: 15mg



Leave a Comment