If you’re looking for a dessert that captures the essence of fall without any fuss, then you’ll absolutely adore these No-Bake Pumpkin Cheesecake Jars. This recipe is a favorite in our house because it combines the warm flavors of pumpkin and spice with creamy cheesecake goodness—all in a charming little jar! Perfect for busy weeknights or family gatherings, these delightful treats require no oven time, making them an easy choice for any occasion.
These jars are not only delicious but also visually appealing. You can layer the ingredients to create a beautiful presentation, leaving everyone eager for a taste. Whether you’re serving them at a holiday get-together or just treating yourself after a long day, this recipe will surely bring smiles all around.
Why You’ll Love This Recipe
- No baking required: Enjoy the convenience of a dessert that comes together quickly without turning on your oven.
- Family-friendly: Kids and adults alike will fall in love with the creamy texture and sweet pumpkin flavor.
- Make-ahead option: Prepare these jars ahead of time, and they’ll be ready when you need them—perfect for stress-free entertaining!
- Versatile presentation: Serve them in cute jars or glasses for an elegant touch that impresses without extra effort.
- Deliciously seasonal: Celebrate fall flavors with every spoonful, making it an ideal treat for autumn festivities.
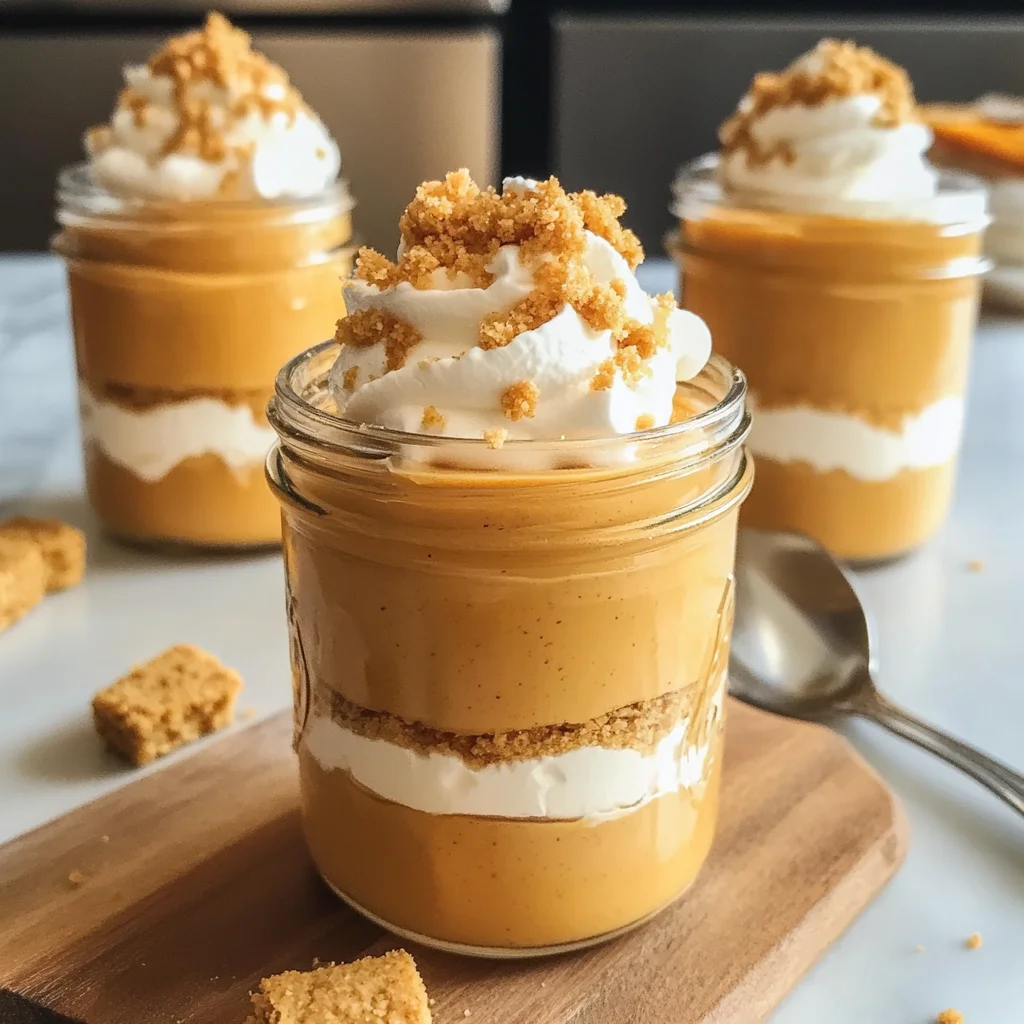
Ingredients You’ll Need
Gathering the ingredients for these No-Bake Pumpkin Cheesecake Jars is easy! You’ll find everything you need right at your local grocery store. These simple, wholesome ingredients come together to create layers of flavor that are sure to please.
For the Crust
- 1 cup graham cracker crumbs
- 4 tablespoons unsalted butter, melted
For the Cheesecake Filling
- 1 package cream cheese, softened (8 oz.)
- ⅓ cup powdered sugar
- 3 tablespoons brown sugar
- ½ cup canned pumpkin puree
- 1 teaspoon pumpkin pie spice
- ½ teaspoon ground cinnamon
- ½ teaspoon vanilla extract
- pinch salt
- ¾ cup thawed whipped topping
For Garnish
- whipped cream (for garnish)
- graham cracker crumbs (for garnish)
Variations
This recipe is wonderfully flexible! Feel free to mix things up based on your preferences or what you have on hand. Here are some fun ideas to inspire your creativity:
- Add chocolate drizzle: Enhance the flavor by drizzling melted chocolate over each jar before serving.
- Use different spices: Experiment with nutmeg or ginger for a unique twist on the classic pumpkin spice profile.
- Incorporate nuts: Add crushed pecans or walnuts to the crust for an extra crunch and rich flavor.
- Try different toppings: Swap out whipped cream for a dollop of coconut whipped cream for a dairy-free option.
How to Make No-Bake Pumpkin Cheesecake Jars
Step 1: Prepare the Crust
Begin by mixing the graham cracker crumbs with melted butter in a bowl until combined. This mixture acts as the base of your jars and provides that lovely crunchy texture. Press it firmly into the bottom of each jar so it holds its shape when layered with the filling.
Step 2: Make the Cheesecake Filling
In another bowl, beat together softened cream cheese, powdered sugar, brown sugar, pumpkin puree, pumpkin pie spice, ground cinnamon, vanilla extract, and a pinch of salt until smooth. Mixing these ingredients well ensures that every bite is creamy and flavorful. Once combined, gently fold in the thawed whipped topping to give it that fluffy texture we all love!
Step 3: Layer Your Jars
Start layering by adding a spoonful of cheesecake filling over the crust in each jar. Repeat this process until you’ve filled each jar to your desired height. The layers not only look beautiful but also create delightful bursts of flavor with each spoonful.
Step 4: Chill and Serve
Cover each jar and refrigerate for at least four hours—or even overnight if you can wait! Chilling allows all those wonderful flavors to meld together perfectly. When ready to serve, top each jar with whipped cream and sprinkle additional graham cracker crumbs on top for that finishing touch.
Enjoy creating these No-Bake Pumpkin Cheesecake Jars! They truly are an easy way to celebrate fall flavors while keeping dessert time delightful and stress-free.
Pro Tips for Making No-Bake Pumpkin Cheesecake Jars
Creating a delightful dessert is easier than you think, especially with these helpful tips!
-
Use room temperature cream cheese: This helps achieve a smooth and creamy texture, making it easier to blend with the other ingredients and prevents lumps in your cheesecake filling.
-
Chill your jars: For best results, chill the jars before layering. This will help the cheesecake set nicely and maintain its shape when served.
-
Experiment with spices: Feel free to adjust the amount of pumpkin pie spice and cinnamon based on your taste preference. A little more spice can enhance the flavor profile and bring out that cozy fall vibe.
-
Layer thoughtfully: Alternate layers of graham cracker crust and pumpkin cheesecake to create beautiful visual appeal. It makes each bite deliciously balanced and visually enticing!
-
Let them set overnight: While 4 hours is sufficient, letting the jars sit overnight allows the flavors to meld beautifully, resulting in a richer taste.
How to Serve No-Bake Pumpkin Cheesecake Jars
Serving these charming jars is not just about the taste; it’s also about presentation! Here are some fun ideas:
Garnishes
- Whipped cream: A dollop on top adds an airy lightness and a touch of elegance.
- Cinnamon sprinkle: A light dusting of ground cinnamon or nutmeg on top provides a warm, inviting aroma and enhances the fall theme.
Side Dishes
- Apple slices with caramel dip: Crisp apple slices complement the creamy cheesecake beautifully, while caramel offers a sweet contrast.
- Spiced pecans: These add a crunchy texture and a nutty flavor that pairs perfectly with pumpkin.
- Vanilla ice cream: A scoop of vanilla ice cream can turn this dessert into an indulgent treat that’s perfect for sharing.
- Ginger snaps: These cookies provide a spicy crunch that brings out the flavors of pumpkin pie spice in your jars.
With these tips and serving suggestions, your No-Bake Pumpkin Cheesecake Jars will be not only delicious but also a feast for the eyes! Enjoy every spoonful of this seasonal delight.
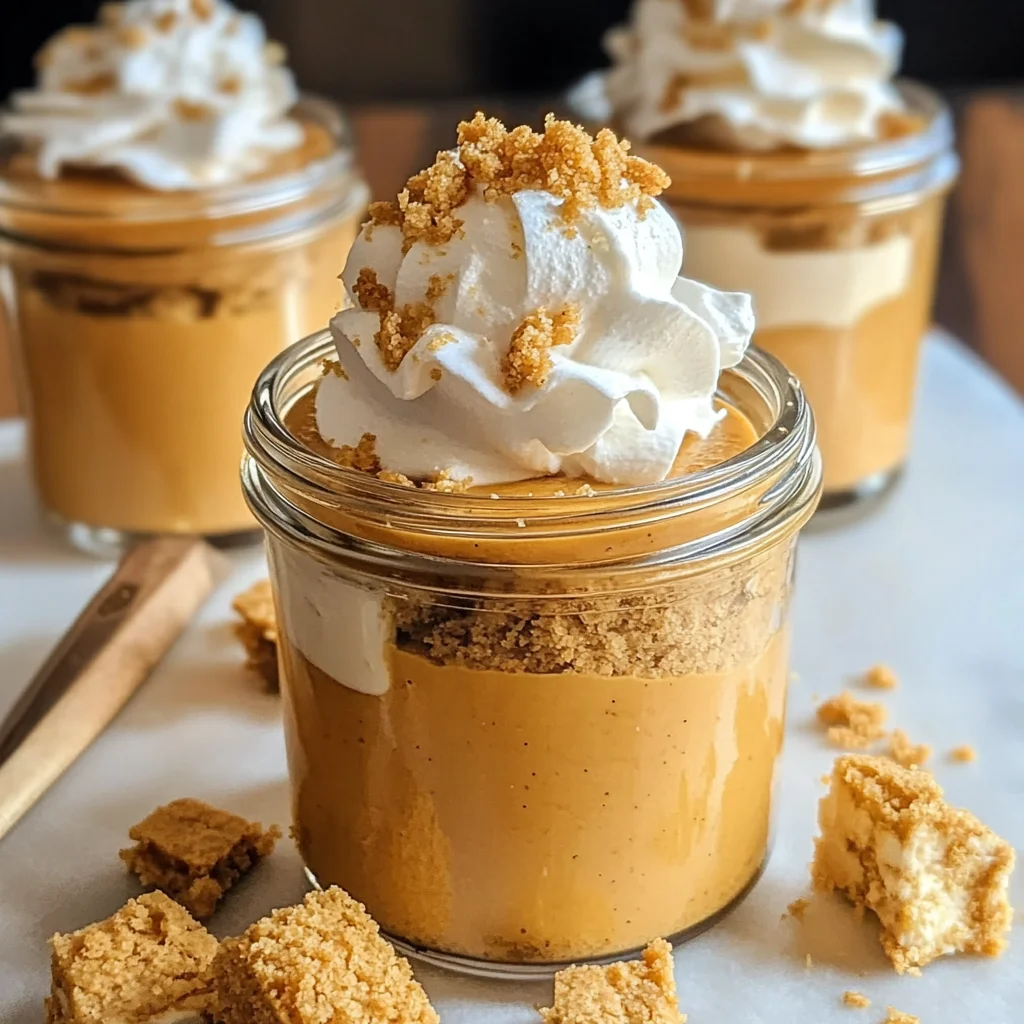
Make Ahead and Storage
These No-Bake Pumpkin Cheesecake Jars are a fantastic option for meal prep, allowing you to enjoy a delicious fall dessert without the fuss of baking. You can make them ahead of time and store them in your fridge, making them perfect for gatherings or cozy nights at home.
Storing Leftovers
- Store any leftover jars in an airtight container in the refrigerator.
- Enjoy them within 3-4 days for the best flavor and texture.
- If you need to save space, consider transferring the cheesecake mixture to a sealed container without the crust and toppings, adding those just before serving.
Freezing
- While it’s best to enjoy these jars fresh, you can freeze them if needed.
- Place the jars in the freezer without the whipped topping and any garnishes.
- They can be stored in the freezer for up to 2 months. Just remember to label them!
- To thaw, move them to the refrigerator overnight before enjoying.
Reheating
- There’s no need to reheat these cheesecake jars since they’re served cold.
- Simply remove from the fridge, add your desired toppings, and they’re ready to eat!
FAQs
Here are some common questions you might have about making No-Bake Pumpkin Cheesecake Jars.
Can I use a different type of crust for No-Bake Pumpkin Cheesecake Jars?
Absolutely! While graham cracker crust is classic, feel free to experiment with crushed cookies like gingersnaps or even a nut-based crust for a gluten-free option.
How long do No-Bake Pumpkin Cheesecake Jars last in the fridge?
These delightful jars will stay fresh for about 3-4 days when stored properly in an airtight container.
Can I make No-Bake Pumpkin Cheesecake Jars without cream cheese?
Yes! You can substitute cream cheese with a dairy-free cream cheese alternative if desired. The texture may vary slightly but will still be delicious!
What occasions are perfect for serving No-Bake Pumpkin Cheesecake Jars?
These jars are ideal for fall gatherings, Thanksgiving dinners, or any cozy get-together where you want a sweet treat that doesn’t require baking.
Final Thoughts
I hope this recipe brings a smile to your face as much as it does mine! These No-Bake Pumpkin Cheesecake Jars are not only simple to prepare but also capture all the warm flavors of fall. Enjoy making these delightful treats and savor each creamy bite. Don’t forget to share your creations with friends and family—they’re sure to love them too!
Desserts
nn
n
Why You’ll Love This Recipe
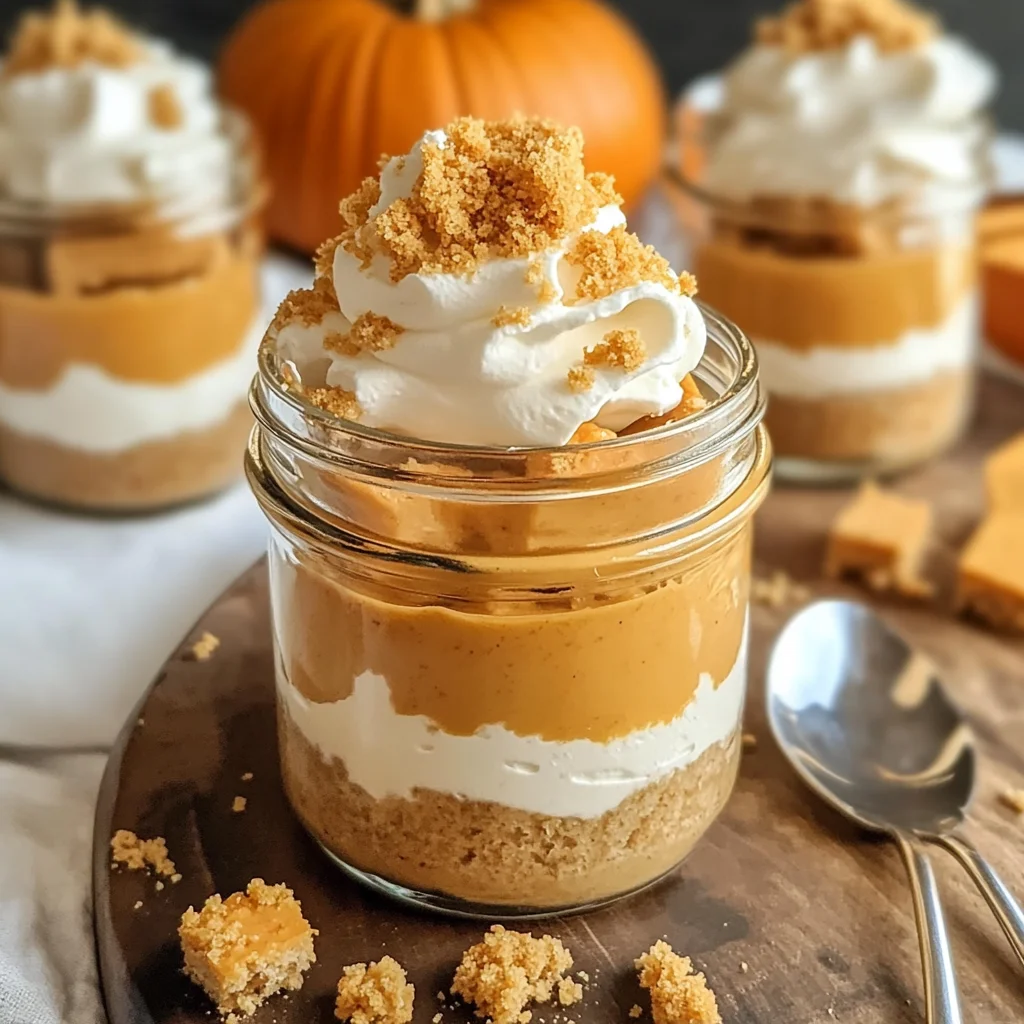
These No-Bake Pumpkin Cheesecake Jars are the ultimate fall dessert! They combine the creamy, rich texture of cheesecake with the warm, inviting flavors of pumpkin and spices. Perfect for gatherings, they require no baking, making them easy to whip up. Plus, they’re served in adorable jars, adding a charming touch to your dessert table. Each spoonful is a delightful blend of sweetness and spice that will leave you craving more!
Ingredients You’ll Need
- For the crust:
- 1 cup graham cracker crumbs
- 4 tablespoons unsalted butter, melted
- For the filling:
- 1 package cream cheese, softened (8 oz.)
- ⅓ cup powdered sugar
- 3 tablespoons brown sugar
- ½ cup canned pumpkin puree
- 1 teaspoon pumpkin pie spice
- ½ teaspoon ground cinnamon
- ½ teaspoon vanilla extract
- pinch salt
- ¾ cup thawed whipped topping
- For garnish:
- whipped cream
- graham cracker crumbs
Variations
- Spice it up: Add a dash of nutmeg or ginger for an extra kick of flavor.
- Chocolate lovers: Mix in chocolate chips or drizzle chocolate sauce on top for a decadent twist.
- Nutty flavor: Incorporate crushed nuts, such as pecans or walnuts, into the crust for added texture.
- Dairy-free option: Use dairy-free cream cheese and whipped topping for a vegan-friendly version.
How to Make
- Prepare the crust:
- In a mixing bowl, combine graham cracker crumbs and melted butter. Mix until the crumbs are evenly coated.
-
Press the mixture into the bottom of each jar to form a crust layer.
-
Make the filling:
- In a large bowl, beat the softened cream cheese with an electric mixer until smooth.
- Gradually add powdered sugar and brown sugar, mixing until well combined.
- Add pumpkin puree, pumpkin pie spice, ground cinnamon, vanilla extract, and salt. Mix until smooth.
-
Gently fold in the thawed whipped topping until fully incorporated.
-
Layer the jars:
- Spoon a layer of the pumpkin cheesecake filling over the crust in each jar.
-
Repeat the layers until the jars are filled, finishing with a layer of whipped topping on top.
-
Chill:
- Refrigerate the jars for at least 4 hours or overnight to set.
Pro Tips
- Room temperature ingredients: Make sure your cream cheese is softened to room temperature for easy mixing.
- Chill before serving: Allowing the jars to chill overnight enhances the flavors and helps the filling set perfectly.
- Presentation: Use clear jars to showcase the beautiful layers of crust and filling.
How to Serve
Serve these No-Bake Pumpkin Cheesecake Jars chilled, topped with a dollop of whipped cream and a sprinkle of graham cracker crumbs for a delightful presentation. They make a lovely addition to any fall gathering or holiday feast!
Make Ahead and Storage
You can make these cheesecake jars a day in advance, making them a convenient option for entertaining. Store the jars in the refrigerator, covered, for up to 3 days. Just add the whipped cream garnish right before serving for the best texture and flavor.
FAQs
-
Can I use fresh pumpkin instead of canned?
Yes, you can use fresh pumpkin puree, but make sure it’s well-cooked and blended to a smooth consistency. -
Is this recipe gluten-free?
To make it gluten-free, substitute the graham cracker crumbs with gluten-free alternatives. -
Can I freeze these jars?
While they’re best served fresh, you can freeze the filling in airtight containers. Thaw in the refrigerator before serving.
Final Thoughts
These No-Bake Pumpkin Cheesecake Jars are not only easy to make but also a delightful way to celebrate the flavors of fall. With their creamy texture and spiced pumpkin goodness, they are sure to impress your family and friends. So, gather your ingredients and get ready to indulge in this scrumptious treat!
No-Bake Pumpkin Cheesecake Jars
Indulge in the cozy flavors of fall with No-Bake Pumpkin Cheesecake Jars. This delightful dessert combines luscious layers of creamy pumpkin cheesecake and a crunchy graham cracker crust, all served in charming jars for an elegant touch. Perfect for busy weeknights or festive gatherings, these treats require no baking and can easily be made ahead of time, letting you enjoy stress-free entertaining. Each spoonful delivers a sweet and spiced experience that captures the essence of autumn and brings smiles to faces young and old alike.
- Prep Time: 20 minutes
- Cook Time: None
- Total Time: 0 hours
- Yield: Makes about 6 servings 1x
- Category: Dessert
- Method: No-Bake
- Cuisine: American
Ingredients
- 1 cup graham cracker crumbs
- 4 tablespoons unsalted butter, melted
- 1 package (8 oz.) cream cheese, softened
- ⅓ cup powdered sugar
- 3 tablespoons brown sugar
- ½ cup canned pumpkin puree
- 1 teaspoon pumpkin pie spice
- ½ teaspoon ground cinnamon
- ½ teaspoon vanilla extract
- Pinch of salt
- ¾ cup thawed whipped topping
Instructions
- Prepare the crust: In a bowl, combine graham cracker crumbs and melted butter until mixed. Press into the bottom of each jar to form the crust layer.
- Make the filling: Beat softened cream cheese with powdered sugar and brown sugar until smooth. Add pumpkin puree, spices, vanilla, and salt; mix well. Gently fold in whipped topping.
- Layer the jars: Spoon cheesecake filling over the crust in each jar, layering as desired until filled.
- Chill: Refrigerate for at least 4 hours or overnight to set.
Nutrition
- Serving Size: 1 jar (150g)
- Calories: 320
- Sugar: 23g
- Sodium: 220mg
- Fat: 20g
- Saturated Fat: 10g
- Unsaturated Fat: 8g
- Trans Fat: 0g
- Carbohydrates: 32g
- Fiber: 1g
- Protein: 4g
- Cholesterol: 40mg
Leave a Comment