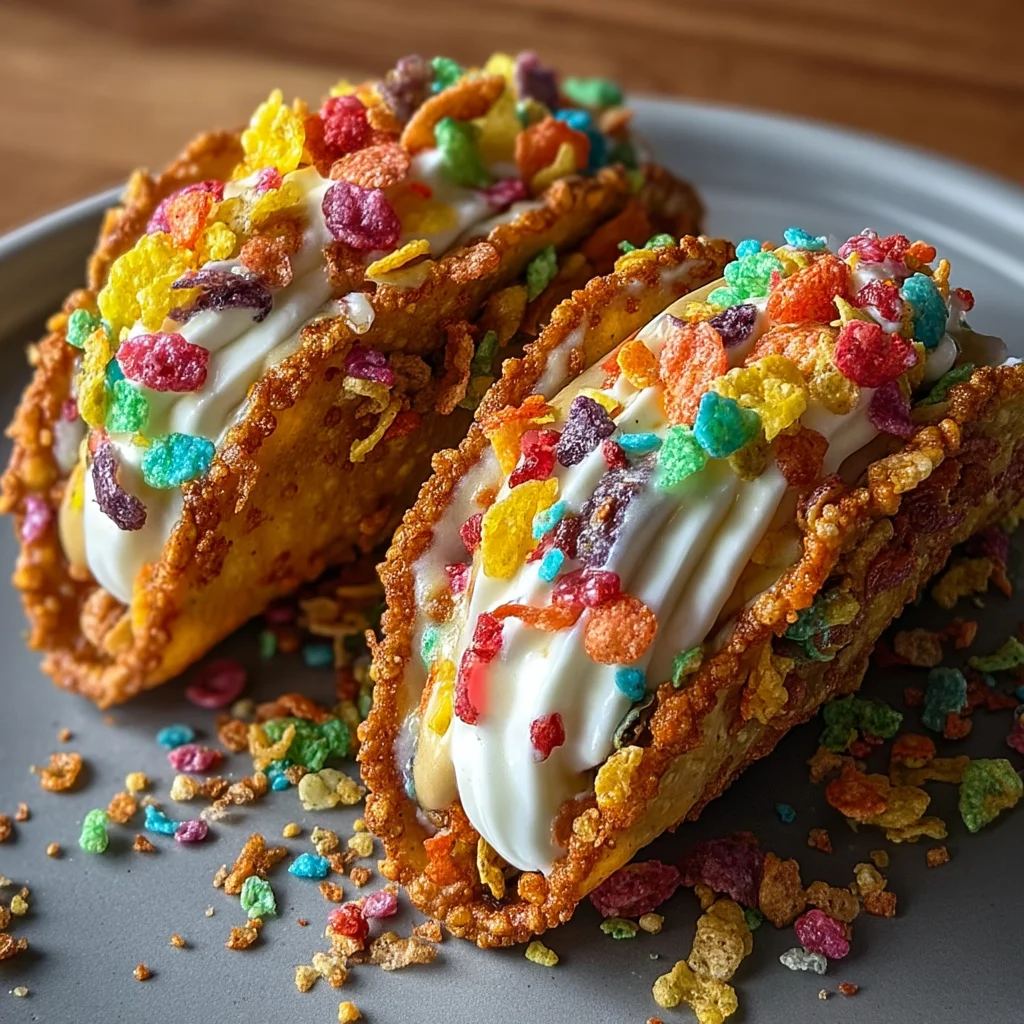
If you’re looking for a fun and whimsical dessert that will bring smiles to everyone at your gathering, you’ve come to the right place! Fruity Pebbles Cheesecake Tacos are not just a treat but an experience. Imagine crunchy cereal shells filled with creamy cheesecake goodness, topped with vibrant fruity cereal. It’s a playful twist on traditional desserts that makes it perfect for parties, kids’ birthdays, or simply when you want to indulge your sweet tooth.
This recipe is one of my favorites because it combines nostalgia with creativity. Plus, it’s super easy to whip up, making it a wonderful choice for busy weeknights or delightful family gatherings. Everyone can get involved in making their own colorful tacos, adding a sprinkle of joy to any occasion!
Why You’ll Love This Recipe
- Quick and Easy: With just a few simple steps, you’ll have these delightful treats ready in no time.
- Family-Friendly Fun: Kids and adults alike will love assembling their own tacos, making it a hit at any event!
- Make Ahead Convenience: Prepare the taco shells in advance and fill them just before serving for an effortless dessert.
- Colorful and Appealing: The vibrant colors make these tacos not only tasty but also visually stunning—perfect for impressing guests or brightening up your day.
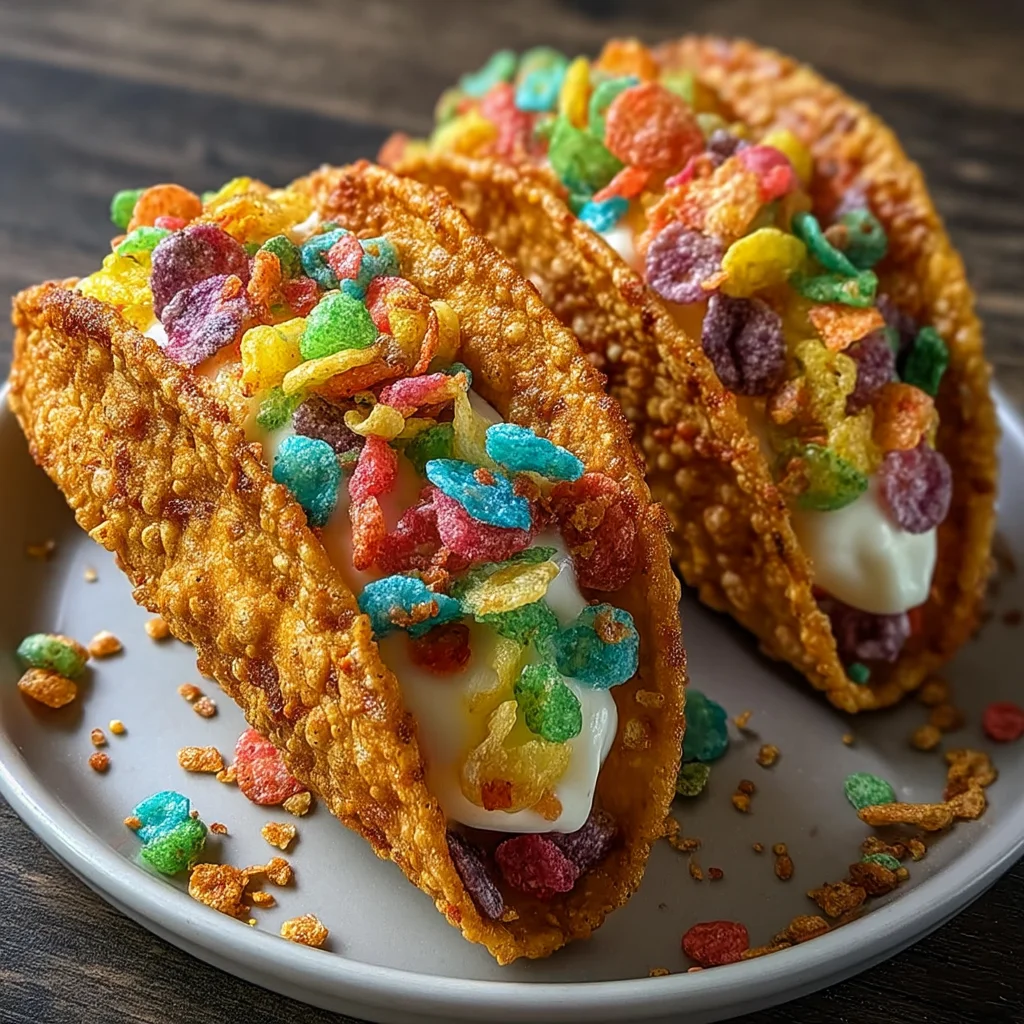
Ingredients You’ll Need
Creating these Fruity Pebbles Cheesecake Tacos is simple, thanks to the wholesome ingredients you probably already have on hand. Let’s gather what you need to bring this delightful dessert to life!
For the Cereal Shells
- 3 cups fruity cereal
- 1/2 cup unsalted butter, melted
For the Cheesecake Filling
- 8 oz cream cheese, softened to room temperature
- 1/2 cup powdered sugar, sifted
- 1 tsp pure vanilla extract
- 1 cup whipped cream
To Garnish
- Additional fruity cereal for topping
Variations
One of the best things about these Fruity Pebbles Cheesecake Tacos is their versatility! Feel free to experiment with different flavors and ingredients based on your preferences.
- Try Different Cereals: Use other colorful cereals like rainbow puffs or chocolate crispy rice for unique flavor combinations.
- Make it Vegan: Substitute cream cheese with vegan cream cheese and use coconut whipped cream instead.
- Add Fruit Toppings: Top your tacos with fresh fruits like strawberries or bananas for an extra burst of flavor and nutrition.
- Create a Chocolate Version: Mix cocoa powder into the cheesecake filling for a chocolatey twist that pairs wonderfully with fruity toppings.
How to Make Fruity Pebbles Cheesecake Tacos
Step 1: Prepare the Cereal Shells
Start by combining the fruity cereal and melted butter in a mixing bowl. This step is crucial because the butter helps bind the cereal together, creating those delicious taco shells. Make sure every piece is evenly coated so they hold their shape when pressed.
Step 2: Mold the Taco Shells
Next, press the cereal mixture firmly into small taco-shaped molds or muffin tins. It’s important to compact them tightly; this will ensure they hold up when filled later. After molding, chill them in the refrigerator for at least 30 minutes. This step allows them to set properly—trust me; it’s worth the wait!
Step 3: Make the Cheesecake Filling
While your shells chill, whip up the cheesecake filling! Using a hand mixer, beat the softened cream cheese until light and fluffy. Gradually add in powdered sugar and vanilla extract while blending until smooth. This creamy mixture is what makes each bite so delightful.
Step 4: Fold in Whipped Cream
Gently fold whipped cream into your cream cheese mixture using a spatula. Be careful not to overmix; you want that light and airy texture that makes this cheesecake so irresistible!
Step 5: Fill Your Taco Shells
Once your cereal shells are firm from chilling, generously spoon that luscious cheesecake filling into each shell. The key here is not to be shy—fill them up!
Step 6: Add Final Touches
Finally, sprinkle additional fruity cereal over the filled shells for that extra crunch and fun factor. You can serve them immediately or chill again for a firmer texture if desired. Enjoy these vibrant treats fresh out of your kitchen!
Pro Tips for Making Fruity Pebbles Cheesecake Tacos
Creating the perfect Fruity Pebbles Cheesecake Tacos can be a delightful experience! Here are some tips to help you achieve the best results:
-
Use room temperature cream cheese: This ensures that your cheesecake filling is smooth and creamy, making it easier to blend with the other ingredients.
-
Pack the cereal shells tightly: By compressing the cereal mixture firmly into the molds, you create sturdy taco shells that hold their shape when filled.
-
Chill before serving: Allowing the tacos to chill helps them set properly, which enhances the texture and makes them easier to eat.
-
Get creative with toppings: Don’t hesitate to add fun toppings like sprinkles or fresh fruit; they not only add flavor but also make your tacos visually appealing.
-
Make ahead of time: These tacos can be prepared a day in advance. Just keep them stored in an airtight container in the fridge until you’re ready to serve for an easy dessert option!
How to Serve Fruity Pebbles Cheesecake Tacos
Serving Fruity Pebbles Cheesecake Tacos is all about presentation and enhancing the fun experience. Here are a few ideas to elevate your dessert:
Garnishes
- Whipped cream: A dollop on top adds a fluffy texture and enhances the creaminess of the cheesecake.
- Colorful sprinkles: These can bring an extra pop of color and make your tacos even more festive.
- Fresh fruit: Slices of strawberries or blueberries provide a fresh contrast that balances the sweetness.
Side Dishes
- Fruit salad: A light and refreshing side that complements the sweetness of your tacos while adding nutritional value.
- Vanilla ice cream: A scoop of this classic favorite offers a creamy contrast that pairs beautifully with fruity flavors.
- Chocolate-covered strawberries: Their rich chocolatey taste provides a decadent touch that elevates your dessert spread.
- Mini cupcakes: These bite-sized treats add variety and make for an appealing dessert table display, perfect for parties or gatherings.
Make Ahead and Storage
This Fruity Pebbles Cheesecake Tacos recipe is perfect for meal prep, allowing you to enjoy the fun dessert without the fuss on busy days.
Storing Leftovers
- Store any leftover cheesecake tacos in an airtight container in the refrigerator.
- They are best enjoyed within 2-3 days for optimal freshness.
Freezing
- While it’s not ideal to freeze filled taco shells, you can freeze the empty cereal shells for up to a month.
- To do this, place them in a single layer in a freezer-safe container or bag.
- When ready to use, thaw in the refrigerator before adding the cheesecake filling.
Reheating
- If you’ve frozen the cereal shells, simply let them come to room temperature before filling them again with fresh cheesecake.
- Do not reheat filled tacos, as they are best served chilled.
FAQs
Can I use different cereals for Fruity Pebbles Cheesecake Tacos?
Absolutely! While Fruity Pebbles give these tacos their signature look and flavor, you can substitute with any fruity cereal of your choice for a fun twist.
How long do Fruity Pebbles Cheesecake Tacos last?
These delightful tacos can be stored in the refrigerator for about 2-3 days. Just make sure they are kept in an airtight container to maintain their crunch!
Can I make Fruity Pebbles Cheesecake Tacos ahead of time?
Yes! You can prepare the cereal shells in advance and fill them with cheesecake right before serving. This keeps them crunchy and ensures freshness.
What toppings work well with Fruity Pebbles Cheesecake Tacos?
You can get creative with toppings! Fresh fruits like strawberries or bananas, whipped cream, or even a drizzle of chocolate sauce would pair wonderfully with your cheesecake tacos.
Final Thoughts
Fruity Pebbles Cheesecake Tacos are such a delightful blend of flavors and textures that bring joy to any occasion. I hope you have as much fun making these colorful treats as you will enjoy eating them! Don’t forget to share your creations—your friends and family will love this playful dessert!
Fruity Pebbles Cheesecake Tacos

Fruity Pebbles Cheesecake Tacos are the ultimate whimsical dessert that combines playful flavors and textures, making them a hit for any gathering. These delightful tacos feature crispy cereal shells filled with a creamy cheesecake mixture and topped with a colorful sprinkle of fruity cereal. Perfect for birthday parties, family get-togethers, or simply satisfying your sweet cravings, this easy-to-make treat is sure to bring smiles to faces young and old. With simple ingredients and straightforward steps, you can whip up these vibrant desserts in no time!
- Prep Time: 20 minutes
- Cook Time: None
- Total Time: 0 hours
- Yield: Serves approximately 6 tacos 1x
- Category: Dessert
- Method: No-Bake
- Cuisine: American
Ingredients
- 3 cups fruity cereal
- 1/2 cup unsalted butter, melted
- 8 oz cream cheese, softened
- 1/2 cup powdered sugar
- 1 tsp pure vanilla extract
- 1 cup whipped cream
- Additional fruity cereal for topping
Instructions
- Combine fruity cereal and melted butter in a bowl until evenly coated.
- Press the mixture firmly into taco-shaped molds or muffin tins; chill for at least 30 minutes.
- Beat softened cream cheese until light and fluffy; add powdered sugar and vanilla extract until smooth.
- Fold whipped cream into the cheesecake mixture gently.
- Fill the chilled taco shells with the cheesecake filling generously.
- Top with additional fruity cereal before serving.
Nutrition
- Serving Size: 1 serving
- Calories: 180
- Sugar: 11g
- Sodium: 140mg
- Fat: 9g
- Saturated Fat: 5g
- Unsaturated Fat: 3g
- Trans Fat: 0g
- Carbohydrates: 22g
- Fiber: 1g
- Protein: 2g
- Cholesterol: 25mg
Leave a Comment